Select the Apply button and the Apply Prepaid window appears with a list of all unpaid invoices for the vendor. When the checkbox Limit to Associated Categories is selected, only the invoices with approved Item Categories for the Prepaid are listed. This option prevents the Prepaid being used to settle transactions with items outside approved Item Categories. Be aware that all Items on the invoice must be in an approved Item Category to apply the Prepaid.

Sort the unpaid invoice list a AP Vendor Prepaid can be applied to by selecting any field available in the Sort by: drop down menu located in the upper right corner of the window. Enter a search value in the field to the right. All columns in Browse AP Vendors are available to sort by except Balance. The information available in this window includes
- the Invoice number
- Transaction Type
- The Invoice date and Due Date
- The TTR for entering the invoice and the Financial Period selected.
- The total amount of the invoice is displayed along with the current amount due for the invoice.
Select an invoice then select the Apply button  .
.
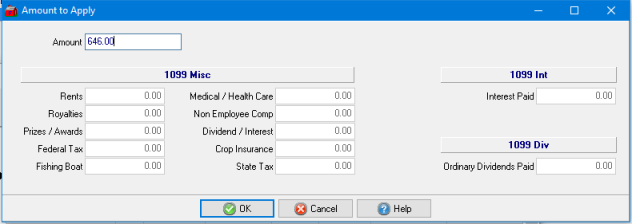
When the Amount to Apply window opens, the total amount to be paid will be in the Amount field. Retain or edit this amount and indicate any applicable amounts in the 1099 fields and select OK. The invoice amount reduces the balance of the AP Vendor Prepaid.
User Profiles with adequate permissions can apply a credit invoice to a Vendor Prepaid that exceeds the prepaid balance.