Promotions provide the greatest flexibility when selecting items that will be offered at a temporarily discounted price. Items can be selected individually or by a range of items, by category or manufacturer. Total Revenue generated is tracked real time and Promotion Potential is calculated. Search, access and add a new Promotion in the Access Promotions menu.
| Access |
| Grant permission to User Profiles in Access User Profiles > select a User Profile > Menu Security > Inventory > Main Menu > Pricing. |
| Grant permission to User Profiles in Access User Profiles > select a User Profile > Security > Inventory > Pricing > Access Promotions. |
Add a New Promotion
Select Add to create a new promotion.
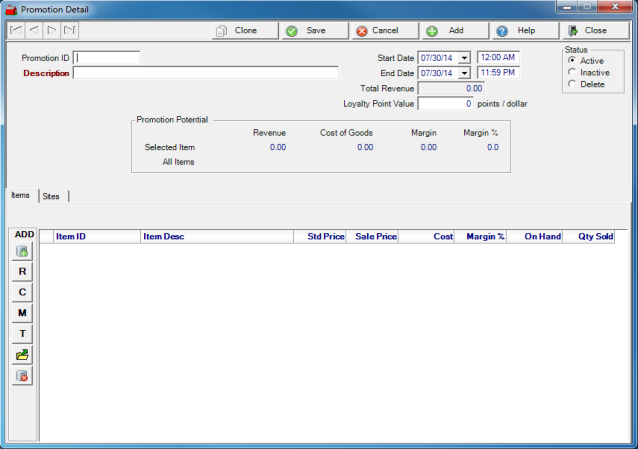
Enter an eight character alpha-numeric Promotion ID in this field.
Enter a Description for this promotion in this fifty character alpha-numeric field.
Select an individual Site by entering the Site number of select F12 to search. If left blank, the promotion will run at all Sites.
Indicate the Start Date and time of the promotion will begin. Select the Start Date from the drop down menu or click into the field and enter a date using the mm/dd/yy date format. Click into the time field to alter the start time from the default of 12:00 AM
End Date indicates the date and time of the promotion will end. Select the End Date from the drop down menu or click into the field and enter a Dat using the mm/dd/yy date format. Click into the time field to alter the start time from the default of 11:59 PM. Be aware that the Status of the Promotion does not change when the End Date and time passes.
Total Revenue reflects the total revenue generated by items sold during the promotion.
Enter the Loyalty Point Value points that will be earned per dollar spent. This applies to items marked as Loyalty Eligible only.
Status of the Promotion which is Active, Inactive or Delete. Note: Promotions do not automatically become Inactive after the promotion End Date.
Promotional Potential
This section calculates the potential revenue if all items were sold during the promotion.
| Revenue | Cost of goods | Margin | Margin % | |
|---|---|---|---|---|
| All Items | Potential Revenue if the On Hand Quantity of all items on promotion sold | Potential Cost of Goods if the On Hand Quantity of all items on promotion sold | The difference between Revenue and Cost of Goods. | Displays the Margin amount as a percentage. |
| Selected Item | Potential Revenue for the selected Item if all On Hand Quantity sold. | Potential Cost of Goods if all On Hand Quantity sold. | The difference between Revenue and Cost of Goods. | Displays the Margin amount as a percentage. |
Add Items
Add items to a promotion using a variety of methods to allow for flexibility in applying different discount percentages, additional editing of price or deleting an item from the promotion. For example, use Range of Items and apply a discount of 2%, then select Category and apply a discount of 5%. Any item listed on the Item grid can be edited or deleted from the promotion.
 - Add an individual Item - Add an individual item then tab to the Sale Price column and enter the Sale Price.
 - Range of Items - Add a range of items by entering a beginning and ending Item ID. Enter the discount percentage for these items.
 - Category - Add a category of items. When adding a category of items, specify the category and the amount of discount to be applied to the L1 Current Price. Use the drop down to specify if the discounted price should apply to Any Site, Promotion Sites or No to allow the promotional price to be used for On Hand Quantity and Discontinued items only. Once items have been added to the Item grid, they can be edited or deleted.
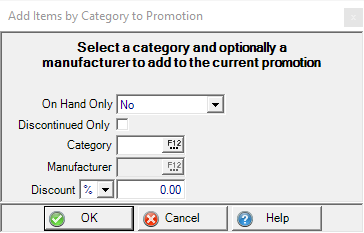
 - Manufacturer - Select a Manufacturer ID and select if Discontinued Only.
 - Tag Items - A method of adding multiple items at once based on shared criteria. See Tagging Items for more information.
 - Import Items - Upload items for a promotion from a two column .csv file.
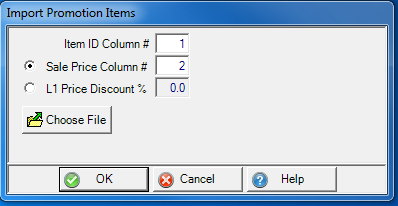
- Item ID Column # - Specify the column number for the Item ID.
- Sale Price Column # - If uploading a promotional price, indicate the column number.
- L1 Price Discount % - If a Discount percentage will be applied to all items imported, indicate the percentage.
- Choose File - Click and navigate to file location.
 - Select Delete to remove an item from the promotion.
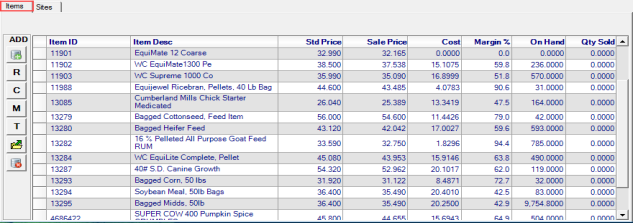
As Items are added to the promotion, the item grid populates.
- Item ID - Item ID of the item on promotion.
- Item Desc - Item Description of the item
- Std Prices - Standard Price - L1 Current price for the item.
- Sale Price - Price of the item while on promotion.
- Cost - Cost of item when last received.
- Margin % - Margin percentage - the margin of the item sale price minus cost
- On Hand - Current On Hand quantity
- Qty Sold - Quantity Sold - Quantity of the item sold while on promotion.
Add Sites
One or multiple sites can added to a Promotion on the Sites tab. If no site is selected, the promotion is available to all Sites.
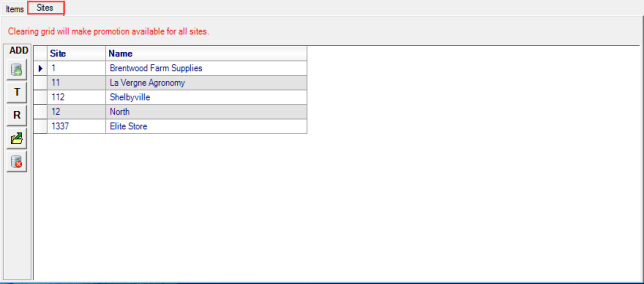
- Add an individual Site- Add an individual Site bye entering the Site ID or select F12 to search.
- Tag Sites - A method of adding multiple Sites at once based on shared criteria. See Tagging for more information.
- Region - Add Sites by selecting a Management Region.
- Import Sites - Upload Sites for a promotion from a two column .csv file. See above for details.
- Select to remove a Site from the promotion.
Clone a Promotion
Use  to copy a Promotion to quickly create a new Promotion.
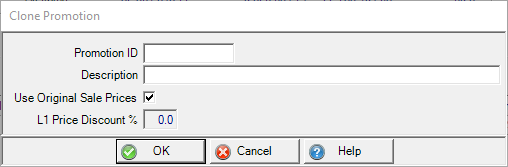
- Promotion ID - Enter a new Promotion ID in this eight character alpha-numeric field.
- Description - Enter a description for this promotion in this fifty character alpha-numeric field.
- Use Original Sale Prices - keeps the Sale price as set in the original Promotion.
- L1 Price Discount - Select and enter a Price discount percentage for this promotion.
 A cloned promotions Start and End Date and Time default to the current date and may need to be edited.